Thursday 20 February 2014

Line Your Eyes

Back in my HOW TO: GEL LINER post I mentioned that I would do a post on different products you can use to line your eyes. Its not as exciting as it sounds, there is a few alternatives to the usual liquid liner that I just wanted to share.

The products I'm using:

From left to right| Collection 2000 Intense Colour Khol Liner, Soap & Glory Super Cat Eye Liner Pen, Revlon ColorStay Liquid Liner, Collection 2000 Gel Liner, Natural Collection Eye-shadow Duo.


These are what I think of as my secret eye-lining weapons. From left to right: a long thin brush, a shorter thin brush, a flat angle brush, cotton buds and eye-shadow primer. The cotton buds are, of course to clean up any messes and the eye-shadow primer is to help it all stay in place. Although sometimes I forget it!

Pencil

Lets start with pencil. Its a much softer more natural finish. I like to warm the pencil up on the back of my hand then draw on a rough line. Then using my flat angle bush I smooth and smudge out the line, then using a cotton bud I clean up the inner corner of my eye making the line a little thinner.

Felt-tip

Felt tips I think are great for beginners, really easy to use and un-likely to make much of a mess.

Liquid

Liquid is my ultimate go to. I've recently started using a long thin brush, dipping that into my liquid liner and applying it with that. Its great for achieving a beautiful thin line and is really easy to use. Much neater than using the dipper it comes with!

Gel

Again with gel liner I use the smaller thin brush to apply my gel liner for a beautiful precise line. I forgot to mention in my gel liner post that I like to warm the gel up by, err breathing over it. Sounds gross I know but if its warmer it helps to glide on better.

Eye-shadow

To line with eye shadow I use the flat angle brush and and load the brush up with eye shadow and line along the lash line. The eye shadow I have isn't very pigmented so I have to go over it a couple times, but I love the look, and again its a very natural looking way to line the eye. And of course using shadows you can experiment with different colours!

Purples great for making brown eyes pop!

Hope you've enjoyed!

Jeni x


Sunday 16 February 2014

Battle of the Brands| Save-VS-Splurge Mascara Edition

Ever wondered whether its worth buying a mascara that's worth a bit more money over one that's just a couple of quid? Well I decided to take 2 of my mascara's and have them battle in out to see what one was better.


Our Contenders

Save
Brand| Natural Collection Lash Length
Price| £1.99
Colour| Black
Purchased at| Boots

Splurge
Brand| L'Oreal Volume Million Lashes
Price| £10.99
Colour| Extra Black
Purchased at| Superdrug

So between the two there is a £9 difference, and I know that £10.99 isn't a massive splurge but I think of L'Oreal as one of the 'premium' drug store brands, and to some people it is kind of a splurge.

So to make my test fair I curled my lashes twice before application using the same lash curler and applied my mascara in the same way - wiggles and rolls and sweeps - and applied the same number of coats - 2.

The lash curler I use is a super cheapo £1 jobby from ASDA and its amazing.


The brushes are very different. The Lash Length spoolie is tapered and what I think of as the more traditional brush type, and the Volume Million Lashes spoolie is a bit fatter and made with plastic brush bristles, great for combing through lashes.


For such a cheap budget mascara I think the Natural Collection Lash Length is AMAZING. It gives my lashes great curl, length and volume, and does a real good job of separating them, although the end result isn't necessarily smooth looking. 
I made sure that after 8 hours of wear to check back with both mascaras to see if they had kept their curl by taking a little photo and comparing, and I'm pleased to report there was no drooping or loss of curl or volume for 8+ hours with this mascara. (sorry I don't have the photo's)


The L'Oreal Volume Million Lashes, again has great curl, length and volume with nice lash separation. The mascara is a little darker and a finer quality, not having any little clumps or fuzziness on the lashes creating a nice smooth lash finish. When you compare the 2 images you may see what I mean. But I'd say over all they a near on par, sort of, and again this mascara lasted 8+ hours without wilting. 

Granted I have done my little experiment in the cooler months and the out come may be different if it was much warmer and humid, so maybe we should take that in to account.

At the end of this experiment/battle-of-brands I think I'm far more likely to re-purchase the Natural Collection mascara simply for the fact I can buy 5 of them for the price of 1 of the Volume Million Lashes and the overall end result is its a pretty similar and in general life no one stops to really stare at your eye lashes. 

Give this little experiment ago if you can because you may find your presently surprised, that sometimes you could be paying more for something that essentially something cheaper can do the same! But then again it could be a flop!

Hope this helped!

Jeni x


Wednesday 12 February 2014

Simple Valentines Day Look

With Valentines Day lurking around the corner I thought it would be kinda nice to do a little hair and make-up look for the day. So far I think my boyfriend's plan for the day is to go out in the stormy, windy, rainy weather that's creating all kinds of devastation across the south-east of England at the moment, and I quote, 'test our waterproofs out'. Super romantic, I know. But its time spent together, plus I get a Domino's pizza at the end of the day!

The make-up look is super easy and very natural looking perfect if your like me and don't like anything too over the top and the hair is cute and girly.

So lets start with the list of make-up I used to achieve the look:


For starters I primed my face with my MUA Matte Perfect Primer to give an even complexion. Then I used my Avon Ideal Flawless Foundation, all over my face. For a cheeky burst of colour I applied my MUA blusher in Bubble Gum to the apples of my cheeks, then swept a little highlighter across the top of my cheeks, I used the MUA Undress Your Skin Shimmer Highlighter. (I bought a few new MUA products so I've been trying them out!) Using my Maybelline New York Brow Pencil and Brow Drama Brow Mascara I filled in my brows to help frame my face. Next up is the eyes....

MUA Glamour Days Eye Shadow Pallette

Click the photo to enlarge for a better image.

Taking shadow 1 a pale gold colour, I applied this all over my lid just using my ring finger(1). Next up I used shadow 2 a slightly darker gold colour, I applied this from the center of my eye, out (2) Again just using my finger. Final shadow 3, a pretty pink colour, I applied this to the outer corner of the eye (3). All 3 of these colours are fairly shimmery so they make the eye appear bright. After applying my shadows I used my MUA Waterproof Liquid Liner to draw a thin-ish line along my eye with a gentle flick at the end(4). Then a quick slick of L'Oreal's Lash Millions Mascara in Ultra Black(5) and I'm almost done! The Finishing touch is highlighting my brow. With such shimmery shadows my brows needed a little lift and to do this I used my NXY Jumbo Eye Pencil in Cottage Cheese to draw a line under my brow and over(6), then blend it out with my ring finger (7).

Lastly I used a combination of Revlon Colour Burst Lip Butter in Strawberry Shortcake and L'Oreal Caresse in Rose Mademoiselle to create a subdued pink pout.


My hair style is simple but effective looking. Start by dividing hair into a deep side part and continue it down to the nape of the neck so you have 2 sections. Clip the biggest section to the side out the way. Then dutch braid in a diagonal line towards the back of your head and tie off. To create some girly dimension to my hair I used my Babyliss Curling wand to create some deep curls to the hair that I had left. Sweeping all hair to one side (the side we curled) pull the braid through so it rest next to your neck. Pull out the hair elastic and get a grip on your 3 strands of braid. Add a little section of hair (from the curled hair) to the strand furthest from your face, then braid once. Then add another little section of hair, to the same side and braid again. Continue this till you are almost fully down your hair, then braid normally and tie off. So we only added hair to one side of the braid, this is called a lace braid. I'll do a post of different braids in the future so you'll get to know what I'm taking about in my hair posts. So if these instructions were confusing, (which I assume they were!) click HERE to see the video where I learnt how to do this :) 

The completed look. Natural looking and girly. And yes I burnt my neck with my wand.

I hope you enjoyed this post, let me know if you try the look out! And remember you don't have to have a partner to feel special on Valentines Day. Have a day to pamper yourself and relax. Self Love is the most important Love of all :)

Jeni x


Monday 10 February 2014

The Liebster Blog Award


I'm so excited! Shurooq Mohamed from ENCHANTED MIRROR OF DESIRE has nominated me for the Liebster Blog Award! First of all a huge thank you to Shurooq it means so much to me, and if you haven't already please check out her blog. Its so wonderfully written and enlightening :)

The Liebster Blog Award is an internet based blogging award given from one blogger to another. In affect its a fun blogging chain letter that allows us all to feel the love and spread the love. There are a few simple rules to follow to qualify for the award and as silly as it seems I see my Liebster Blog Award as a huge milestone achieved in my blogging life!

The Rules

1~ Thank the person who nominated you and post a link to their blog on your blog.

2~ Display the award on your blog by including it in your post and/or displaying it as a 'widget' or 'gadget' Simply right click the image and save then upload it in your post and/or 'add gadget' then select the picture category.

3~ Answer 11 questions about yourself which will be provided to you by the person who nominated you.

4~ Provide 11 random facts about yourself.

5~ Nominate 5-11 blogs that you feel deserve the award, and who have less than 1000 followers.

6~ Create a new list of questions for the blogger to answer.

7~ List these rules in your post (copy and paste) 

8~ Once you've written and published your post, inform the people/blogs that you have nominated them for the Liebster Blog Award and provide a link to your post so that they can learn about it (they might not of heard of it before).

The Questions

1~ Why did you start your blog?
I started my blog as a way to share my thoughts and opinions about products that I'm loving or hating and to share tips, tricks and hairstyles.

2~ Where was your last best vacation?
I think the last time I went to the New Forest with my boyfriend. The weather was lovely and I just love it down there!

3~ Tea or Coffee?
Defiantly Tea :)


4~ If you could meet some one dead or alive who would it be?
This is such a hard question! I've never truly really wanted to meet anyone in particular. But maybe the Queen? Have tea and cake!

5~ Your favourite place to eat out?
I do enjoy going to ZiZi's I love their pizza's and the Silver Birch tress sprouting out the floor!

6~ What is your best childhood memory?
I think Christmases around my Nan and Grandad's playing the Mars Bar Game! 


7~ If any character form a novel could be your best friend, who would you want it to be and why? 
I think Yelena Zaltana from the Chronicles of Ixia novels. She's tough and caring and has magical abilities, so her or maybe Daenerys Targaryen because she is the mother of Dragons, and I love dragons :)


8~ What makes you smile?
Well my boyfriend for one, but Kestrels. Whenever I see them perched on a telephone pole or hovering I can't help but smile!


9~ Do you like the way you are?
Some times! I'm I total Gemini, I defiantly have 2 sides to me. I'm really laid back but I can flip and become super stressy!

10~ What inspires you?
For my blog I grab inspiration from magazines, YouTube, products. In life: Books and TV.

11~ Whats your life dream?
To have a job that I enjoy, a house I can call home, a husband, 2 kids, a little dog and a cat. A happy life.

11 Random Facts

1~ I didn't properly start wearing makeup till I was 15
2~ My favourite super hero is Batman
3~ I'm a big Star Wars fan
4~ I used to have a big crush on David Boreanaz who played Angel in Buffy the Vampire Slayer
5~ I wanted to be Buffy the Vampire Slayer
6~ I used to collect dragons as a kid
7~ I sleep with a stuffed rabbit named Fluffy
8~ I gave up chocolate once for lent but ever since then I can't go a day without it
9~ One of my favourite anime's of all time is Cowboy Bebop
10~ I have a serious obsession with cats
11~ I prefer reading to watching TV
Nominees

Ok this is the hard part trying to find enough people to nominate who haven't been nominated already by Shurooq :P and people with less than 1000 followers. So I have 3. Yes a failure I know But if I come across more people to nominate I will :)

So my nominees are:

Gracie Darling from LITTLE OWL BEAUTY

Vanya from THE BEAUTY BLOG

Nicole from EYE HEART MAKEUP

My questions for you guys

1~ What got you into blogging?
2~ Whats your favourite hair care product?
3~ How do you spend your spare time?
4~ Sweet or Savory?
6~ What do you do other than blogging?
7~ Your favourite shade of lipstick?
8~ Chinese or Indian Takeaway?
9~ Where do you want to travel to most in the world?
10~ Do you have any new year resolutions?
11~ Whats your favourite season?

So I hope you have enjoyed getting to know me a little bit better, and please let me know if you answer any of my questions!

Have a great day!

Jeni x


Review | Tony Moly Appletox Smooth Massage Peeling Cream

So if you've been following me a while you'll know that last September I bought 2 Tony Moly products online that I was super excited about trying. Today I'm gonna chat to you about the Appletox Smooth Massage Peeling Cream.

You know what they say, an apple a day!

Information

Brand| Tony Moly
Price| £5.91
Size| 80g
Packaging| Super cute Apple!
Scent| Mildly appley!
Purchased from| Ebay
Would I Buy Again| Yes

So how do you use this? After cleansing I apply approximately half a 2 pence piece amount of product onto my finger tips then dab on my forehead, cheeks, nose and chin. Then gently massage into the skin in a circular motion like you would a face wash, gradually increasing pressure as I go.


After 30 seconds to a minute of gentle to moderate massaging you'll feel the product slowly begin to dry up a little bit and then you'll start to notice all these dirt beads forming on your face and hands.

Yup! Looks gross!

This is a combination of dirt and dead skin cells from your face and also I would have thought from your finger tips as well. Once sufficiently satisfied that you have massaged all of the cream in and buffed off the maximum amount of dirt, simply rinse and pat dry, then follow with your face cream.

So what do I think of this product? Its amazing, I use it once to twice a week. After ever use my skin feels baby soft and looks bright and radiant. I feel that it does a fab job of removing any excess dirt and oils from my face that I may not have completely removed the day before. And my skin looks so clean and fresh. I would defiantly recommend this product as a must to try! The only down side is that you do have to order online. I got mine through a Korean seller on Ebay, but there are proper websites out there too that ship to the UK such as JOLSE & YESSTYLE.


So if you fancy giving Korean beauty products ago I defiantly suggest this, its a decent price for a product that works really well and will last an age as there is no need to use loads and you get a lot of product!

Hope you have a great day! :)
Jeni x


Friday 7 February 2014

How To: Gel Liner

Good Afternoon and Happy Friday!

To coincide with my recent post: QUICK TIPS| BEST GEL LINER BRUSH I decided to do a 'tutorial' on how I apply my gel liner and what I like and dislike about using it. This is just the way that I apply it and I don't think there is a right or wrong way to it, so just use this as a sort of tip sheet.


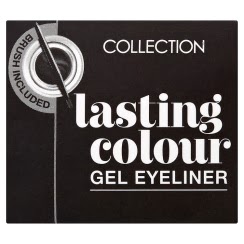
The gel liner I have is by collection 2000 in the colour black.


To start off I like to apply my mascara first and any other eye make up I plan on wearing. I also tight line my upper lash line using a liquid liner. If your unsure what tight lining means, its simply lining the upper lash line/waterline where your lashes protrude forth.


Next I load my thin liner brush up with my gel liner and draw a very thin line from the inner corner of my eye to the outer corner, keeping the line as close to my lash line as possible. Here I take full advantage of the length of the brushes bristles. I angle the brush flat as a pull it across my eyelid.


Placing the brush at the lower edge of the corner of my eye [hope that makes sense] I angle it upwards to coincide with the angle of my lower lash line then draw another thin line up. Here you can make your cat-flick as long or as short as your want. Always keep a few cotton buds on hand to clear away any mistakes. 


Next, place the tip of the brush at the tip of your flick and pull it back towards your line to create a little triangle. Then you want to fill in the gap. Once done, this is where you can make adjustments to your cat-flick either making it a little bit thicker and pulling it in towards the middle of your eye a bit more. I try to keep it as graduated as possible. So having the thinnest part at my inner corner and gradually thickening out, before tapering in to a thinner flick at the end.


I am by no means an expert on gel liner or any eye liner for that matter and I still make loads of mistakes depending on whether I'm having a good liner day or not. The main thing to remember is to just give it ago and be confident, and if you make a mess just clear it up with a cotton bud and some make-up remover or water. It all takes practice.

Now on to my little gel liner review!

Information
Brand| Collection 2000
Price| £4.99
Size| 4g
Colour| Black
Packaging| Small glass tub, includes brush
Purchased from| Superdrug
Would I Buy Again| No

So I can't say I've had a lot of experience using different gel liners, because I haven't. I've only used this particular one and the B.Dramatic gel liner. One thing I do like about using gel liner is the crisp, precise line that can be achieved. But with this gel liner it smudges so easily and bleeds all over my eye lid. So within - and I genuinely am not kidding - half an hour, or less my gel liner has bled and moved to my crease, its not pretty and I look a hot mess. That could be due to having oily eyelids, it could be due to the formulation, or it could be because its gel. I'm not 100% sure. So wear-ability of this liner, for me is pretty much zero. I do however go over the line that I have created with a liquid liner and have found it stays much longer. Because I have so much product left I can't bring myself to throw it away just yet and so will still use it, then its on to finding a new gel liner that will stay in place.

Does anyone know of any good gel liners to try? 

I hope this post was helpful! You can use my basic guide and apply that to liquid liner too and have fun with it! I'll do a post to show different products that you can use to line your eyes such as pencil and eye-shadow as each as a different and unique look that is great for different occasions!


Jeni x


Sunday 2 February 2014

Review | Avon Ideal Flawless Cream to Powder Foundation

Hi guys!
Today I'm reviewing the Avon Ideal Flawless Cream to Powder Foundation.


Information
Brand| Avon
Price| £12 currently £6.50 on offer
Size| 9g
Colour| Shell
Packaging| Black plastic compact style, with a mirror and sponge included
Would I re-purchase| I don't think so


So I've had this for a few months now and I have bit of a mixed view on this. Its meant to apply as a cream and turn to a powder and in my experience there is no powdery finish. 


The colour match with my skin tone is OK although is a little on the orange side for me. In the catalogue and online it shows much lighter than it actually is, I would say it was more on the Soft Honey side rather than Shell.


The foundation is of light to medium coverage and does a pretty good job of covering up my blemishes and open pores and evening out my skin tone. I apply this with my little orange sponge and it just glides on to the skin like butter and has a super creamy consistency which gives a soft dewy finish making the skin look so luminous and healthy, but I do have to set this with a powder. Powder is a must for me with this foundation, if I skip it, its not long before my whole face begins to look overly dewy, and by that I mean an oil slick. I think if my skin was dryer this would be an amazing foundation, but I really wouldn't recommend it to someone with oily skin. 
Overall I've found this to be bit of a hit and miss. It works really well with my skin some days and not so well other days, but I guess that's really just to do with my skin type. I was a bit disappointed that it doesn't turn in to a powder like the packaging says it should but what can you do! I don't think I'll be repurchasing it any time soon. 

Have a great weekend!

Jeni x